

Introduction
Imagine pulling out your Brother embroidery machine, eager to stitch that perfect logo onto a batch of company shirts, only to realize your digital image isn't ready for the needle. That's where a professional JPG to PES embroidery file conversion service comes in, transforming your everyday photos or designs into stitch-ready files that bring your ideas to life. Whether you're a small business owner looking to brand your apparel or a hobbyist crafting personalized gifts, this service ensures your designs translate seamlessly from screen to fabric. It goes beyond simple file tweaks, focusing on precision to avoid common pitfalls like blurry edges or uneven stitches. Let's explore how these services work, their benefits, and why they're a smart choice for anyone diving into embroidery. By the end, you'll see why JPG to PES file conversion is easier and more rewarding with expert help.
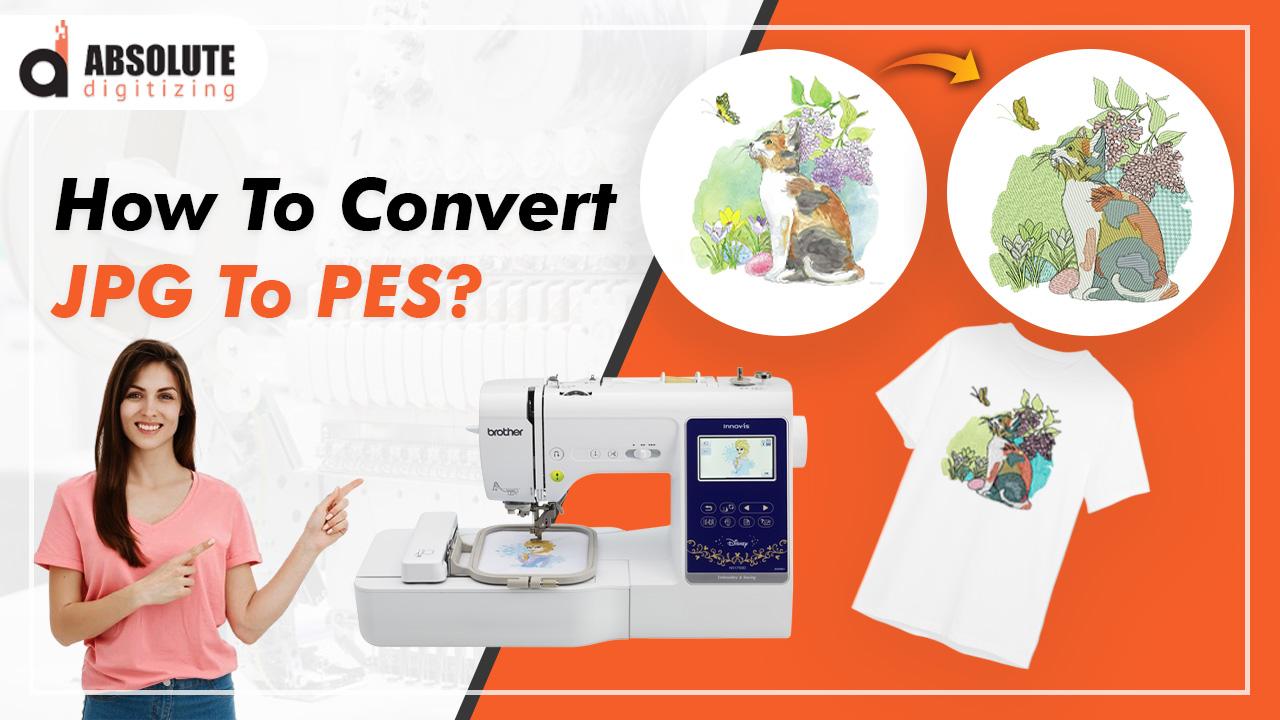
PES files are the go-to format for Brother machines, packing in detailed stitch instructions that JPGs simply can't provide. Professionals handle the nuances, ensuring your final product looks sharp and professional. Stick around as we unpack the essentials.
Why Opt for a Professional Conversion Service?
Hiring a pro for JPG to PES conversion saves you headaches and delivers results you can count on. DIY tools might seem tempting, but they often produce files with gaps, puckering, or mismatched colors—issues that waste thread and time. A professional service analyzes your image, optimizes stitch paths, and tailors the file to your specific needs, like fabric type or design size.
For businesses, this means faster production. Turn around custom merch without delays, keeping clients happy and orders flowing. Hobbyists appreciate the quality boost—your family portrait or vacation snapshot stitches out beautifully, turning a simple project into a cherished keepsake. Plus, it's affordable: expect to pay $15-$40 per design, far less than buying high-end software or outsourcing full production.
These services also offer flexibility. They handle complex designs with fine details or multiple colors, ensuring everything scales perfectly for hoops of any size. With quick turnaround times—often 24-48 hours—you stay on track without sacrificing precision.
Understanding JPG and PES File Formats
JPG files shine for photos and graphics, capturing rich colors and details in a compact raster format. They're easy to create and share but fall short for embroidery because pixels don't translate directly to stitches. Resize a JPG, and it blurs; machines can't interpret the data without help, leading to inconsistent results.
PES files, designed for Brother embroidery machines, solve this by using vector-based instructions. They detail stitch types—like satin for outlines or tatami for fills—along with densities, colors, and sewing orders. This ensures your design looks crisp at any size, with underlay stitches for stability on fabrics like knits or denim.
The conversion process bridges these worlds. Pros simplify your JPG's complexity, reducing colors to 5-8 shades for efficient stitching while preserving the essence. This expertise prevents common issues, making your PES file ready to run smoothly right out of the gate.
How the Professional Conversion Process Works
The magic starts when you upload your JPG to the service's platform or email it directly. Include details like your Brother machine model, desired size, and fabric type—these guide the conversion for optimal results.
The digitizer reviews the image, cleaning up edges and simplifying elements if needed. Using software like Brother PE-Design or Tajima Pulse, they trace the design into vectors, assigning appropriate stitches. For a logo with text, they might use satin stitches for bold letters and fill patterns for solid areas, setting density around 0.4 lines per mm to avoid puckering.
They match colors to standard thread charts, like Robison-Anton, ensuring accuracy. Sewing order gets optimized to minimize thread jumps and changes, speeding up your machine. A simulation check catches any potential flaws, like dense overlaps that could distort fabric.
You receive the PES file via download or email, often with a preview image or stitch count. Many services include 1-2 free revisions, so if the test stitch-out needs tweaks, they refine it quickly. This hands-on approach guarantees a file that stitches perfectly every time.
Benefits for Businesses and Hobbyists
Businesses thrive with professional JPG to PES services because they ensure brand consistency. Your logo on uniforms or promotional items looks uniform and professional, impressing clients and boosting your image. Bulk conversions save time, allowing you to focus on sales rather than tech troubleshooting.
For hobbyists, it's all about joy and creativity. Turn a child's drawing or a scenic photo into a stitched wall hanging without the frustration of trial and error. The service handles the details, letting you experiment with threads and fabrics for unique results. It's also budget-friendly—skip expensive software and get pro quality for a fraction of the cost.
Both groups enjoy the versatility. Services support various design complexities, from simple icons to intricate patterns, and provide files ready for immediate use. The end result? High-quality embroidery that stands the test of time, whether for daily wear or special occasions.
Choosing the Right Conversion Service
Not all services are equal, so shop wisely. Look for ones with strong portfolios showcasing before-and-after examples, especially on fabrics like yours. Check reviews on sites like Trustpilot for insights into reliability and customer support.
Pricing should be transparent—simple conversions around $15, complex ones up to $40. Confirm they specialize in PES for Brother machines and offer quick turnaround. Communication matters too; top services ask questions about your project upfront to avoid mismatches.
Consider extras like rush options or multiple formats if you collaborate with others. Platforms like Etsy or dedicated sites like DigitizingUSA often deliver on these fronts, blending expertise with ease of use.
Tips for Getting the Best Results
Start with a high-res JPG—at least 300 DPI—to ensure sharp details. Clean up the image yourself in free tools like GIMP, removing backgrounds or boosting contrast for easier conversion.
Specify your needs clearly: machine model, hoop size, and fabric type. This helps the pro tailor the file precisely.
Test the PES file on scrap fabric before your main project. Note any issues like thread tension and request revisions promptly.
Keep a library of your converted files, labeled by project, for quick reuse in future stitches.
Common Pitfalls and How to Avoid Them
One frequent mistake: using low-quality images. Blurry JPGs lead to jagged stitches—always opt for clear, high-res files.
Forgetting to mention fabric can cause problems. Dense designs on thin materials pucker; share details to get adjusted densities.
Relying on automated online converters often disappoints—they lack the human touch for complex designs. Stick to professional services for reliability.
Skipping test runs risks surprises. Always stitch a sample first to verify the file performs as expected.
Conclusion
A professional JPG to PES embroidery file conversion service unlocks the full potential of your designs, delivering stitch-perfect results that elevate your projects. From businesses seeking branded excellence to hobbyists crafting heartfelt pieces, this service offers precision, speed, and ease without the hassle. By choosing a reliable provider and prepping your JPG thoughtfully, you ensure every embroidery run goes smoothly. So, dig out that favorite image, connect with a pro service, and watch your creativity stitch into reality. Your next custom masterpiece is just a conversion away!